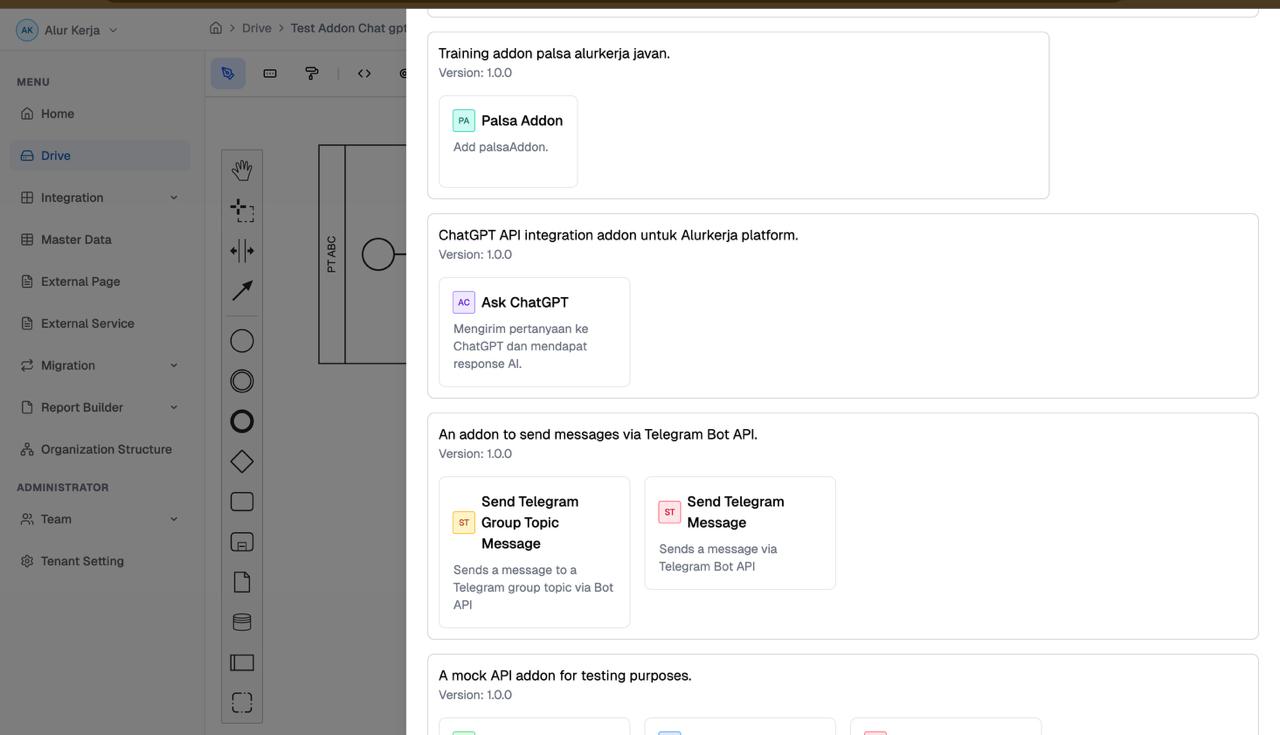
Integrations/Addon
Pembuatan Addon pada AlurKerja
Integrasi ke MockAPI Test AddOn
1. Arsitektur dan Konsep Dasar
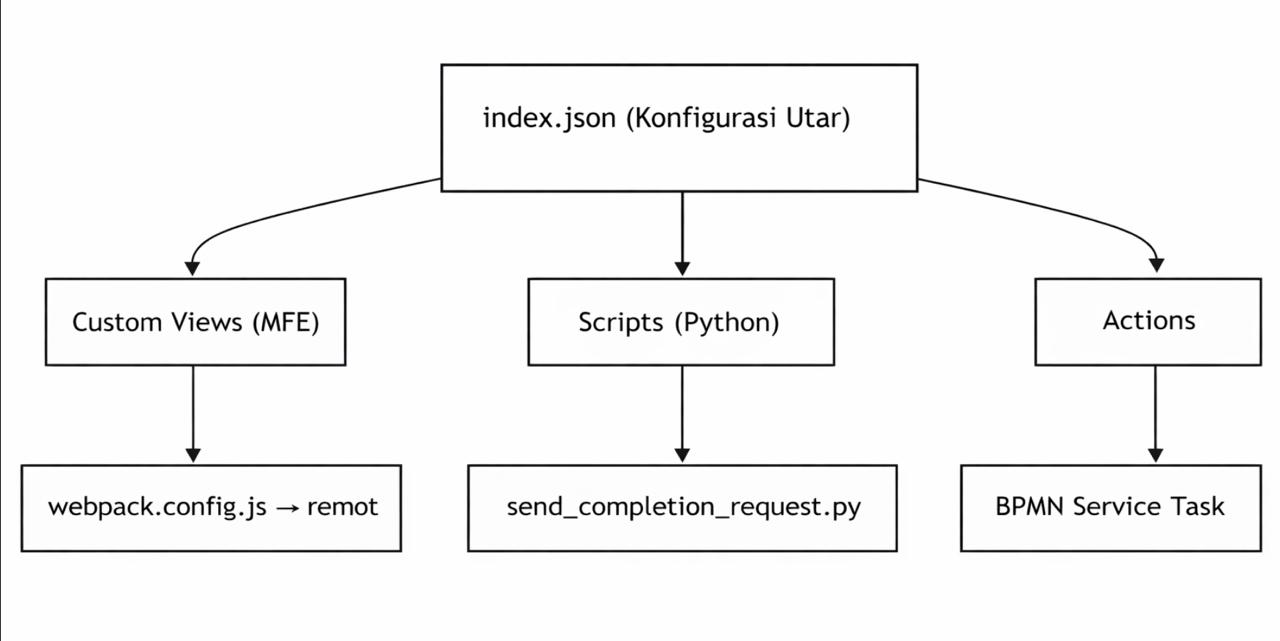
- Index.json berfungsi Manifest utama addon, untuk mendaftarkan semua komponents
- Custom Views untuk form UI dengan konfigurasi addon dan input action
- Scripts berfungsi sebagai Logika bisnis untuk memanggil OpenAI ChatGPT API
- Actions endpoint yang bisa di gunakan di BPMN workflow
2. Structure Folder Addon
addon-integrasi-api-chatgpt/
├── index.json                              ← Manifest utama addon
├── README.md                               ← Dokumentasi addon
├── HOW-TO.md                               ← Panduan pembuatan
├── scripts/                                ← Action scripts (Python)
│   ├── README.MD                           ← Panduan penulisan script
│   ├── requirements.txt                    ← Dependensi Python
│   ├── test_integration.py                 ← Script test integrasi
│   └── send_completion_request/
│       ├── send_completion_request.py      ← Script utama ChatGPT
│       └── request.example.json            ← Contoh request payload
└── views/                                  ← Micro Frontend (React)
    ├── package.json
    ├── webpack.config.js                   ← Konfigurasi MFE + Module Federation
    ├── tailwind.config.js
    ├── tsconfig.json
    ├── postcss.config.js
    ├── public/
    │   └── index.html
    ├── dist/                               ← Hasil build (jangan hapus)
    │   ├── bundle.js
    │   └── remoteEntry.js                  ← Diload oleh Alurkerja
    └── src/
        ├── index.js                        ← Entry point
        ├── bootstrap.js                    ← Export semua komponen
        ├── App.tsx
        ├── ChatGPTConfigForm.tsx            ← Form konfigurasi API
        ├── AskChatGPTView.tsx               ← Form input action
        └── type/
            └── AlurkerjaType.ts            ← TypeScript types
3. Structure File index.json
name → Nama addon yang akan di tampilkan di UI alurkerja
addon_key → identifier unik
view_type → di gunakan untuk MFE
view_path → Path untuk build webpack
components_scope → Harus sama dengan name di webpack.confi.js → ModuleFederationPlugin
scripts → Deklarasi script Phyton yang bisa di panggil
actions → Action yang akan muncul sebagai pilihan di BPMN service Task
4. Install AlurKerja Click
npm install -g alurkerja-cli5. Clone Project
https://gitlab.javan.co.id/alurkerja/on-premises/addons/addon-integrasi-api-chatgpt.git
cd views
npm install
6. Set Up MFE
- Paste file views/webpack.config.js :
const HtmlWebpackPlugin = require('html-webpack-plugin');
const { ModuleFederationPlugin } = require('webpack').container;
const path = require('path');

module.exports = {
mode: 'development',
entry: path.resolve(__dirname, './src/index.js'),
devServer: {
    port: 3001,                    // Port dev server lokal
    historyApiFallback: true,
},
output: {
    publicPath: 'auto'             // Penting untuk Module Federation
},
resolve: {
    extensions: ['.ts', '.tsx', '.js', '.jsx']
},
module: {
    rules: [
    { test: /\.(ts|tsx|js|jsx)$/, loader: 'babel-loader', exclude: /node_modules/ },
    { test: /\.css$/, use: ['style-loader', 'css-loader', 'postcss-loader'] },
    { test: /\.(png|jpe?g|gif|svg)$/i, type: 'asset/resource' }
    ]
},
plugins: [
    new ModuleFederationPlugin({
    name: 'chatgpt_view',           // ← HARUS SAMA dengan component_scope di index.json
    filename: 'remoteEntry.js',     // ← File ini yang di-load Alurkerja
    exposes: {
        // Key: nama modul yang di-expose
        // Value: path file komponen
        './chat_gpt_config': './src/ChatGPTConfigForm.tsx',
        './ask_chatgpt_view': './src/AskChatGPTView.tsx',
    },
    shared: {
        react: { singleton: true },           // Hanya satu instance React
        'react-dom': { singleton: true },
        'react-hook-form': { singleton: true },
        leaflet: { singleton: true },
    }
    }),
    new HtmlWebpackPlugin({ template: './public/index.html' })
]
};- Buat TypeScript at views/src/type/AlurkerjaType.ts
import { UseFormReturn } from 'react-hook-form';

export interface AlurkerjaMfeProps {
    form: UseFormReturn<any>;           // React Hook Form instance
    alurkerjaParams?: {
        [key: string]: any;             // Parameter dari platform
    };
}
7. Buat Konfigurasi View
- Buat komponents views/src/ChatGPTConfigForm.tsx dengan full code di bawah ini:
    import React from 'react';
import { AlurkerjaMfeProps } from './type/AlurkerjaType';

const ChatGPTConfigForm: React.FC<AlurkerjaMfeProps> = ({ form, alurkerjaParams }) => {
    const { register } = form;

    return (
        <div className="space-y-4 p-4">
            <h3 className="text-lg font-semibold">Konfigurasi ChatGPT</h3>

            {/* API Key */}
            <div>
                <label className="block text-sm font-medium mb-1">
                    API Key <span className="text-red-500">*</span>
                </label>
                <input
                    {...register('api_key')}
                    type="password"
                    placeholder="sk-xxxxxxxxxxxx"
                    className="w-full border rounded px-3 py-2"
                />
                <p className="text-xs text-gray-500 mt-1">
                    Dapatkan API Key dari <a href="https://platform.openai.com/api-keys" target="_blank" rel="noreferrer">platform.openai.com</a>
                </p>
            </div>

            {/* Model Selection */}
            <div>
                <label className="block text-sm font-medium mb-1">Model</label>
                <select {...register('model')} className="w-full border rounded px-3 py-2">
                    <option value="gpt-3.5-turbo">GPT-3.5 Turbo (Hemat)</option>
                    <option value="gpt-4">GPT-4 (Lebih Pintar)</option>
                    <option value="gpt-4-turbo">GPT-4 Turbo</option>
                    <option value="gpt-4o">GPT-4o (Terbaru)</option>
                </select>
            </div>

            {/* System Prompt */}
            <div>
                <label className="block text-sm font-medium mb-1">System Prompt</label>
                <textarea
                    {...register('system_prompt')}
                    rows={3}
                    placeholder="You are a helpful assistant..."
                    className="w-full border rounded px-3 py-2"
                    defaultValue="You are a helpful assistant."
                />
            </div>
        </div>
    );
};

export default ChatGPTConfigForm;
8. Membuat Action View
- views/src/AskChatGPTView.tsx dengan full code di bawah ini:
    import React from 'react';
import { AlurkerjaMfeProps } from './type/AlurkerjaType';

const AskChatGPTView: React.FC<AlurkerjaMfeProps> = ({ form, alurkerjaParams }) => {
    const { register } = form;

    return (
        <div className="space-y-4 p-4">
            <h3 className="text-lg font-semibold">Ask ChatGPT</h3>

            {/* Prompt Input */}
            <div>
                <label className="block text-sm font-medium mb-1">
                    Prompt / Pertanyaan <span className="text-red-500">*</span>
                </label>
                <textarea
                    {...register('prompt')}
                    rows={4}
                    placeholder="Contoh: Rangkum dokumen berikut: ${variables.document}"
                    className="w-full border rounded px-3 py-2"
                />
                <p className="text-xs text-gray-500 mt-1">
                    Gunakan <code>{'${variables.namaVariable}'}</code> untuk menyisipkan data dari workflow
                </p>
            </div>

            {/* Temperature */}
            <div>
                <label className="block text-sm font-medium mb-1">
                    Temperature (0 – 2)
                </label>
                <input
                    {...register('temperature')}
                    type="number"
                    step="0.1"
                    min="0"
                    max="2"
                    defaultValue="0.7"
                    className="w-full border rounded px-3 py-2"
                />
                <p className="text-xs text-gray-500 mt-1">
                    0 = deterministic (konsisten), 2 = kreatif/acak
                </p>
            </div>

            {/* Max Tokens */}
            <div>
                <label className="block text-sm font-medium mb-1">Max Tokens</label>
                <input
                    {...register('max_tokens')}
                    type="number"
                    defaultValue="1000"
                    min="1"
                    max="4096"
                    className="w-full border rounded px-3 py-2"
                />
                <p className="text-xs text-gray-500 mt-1">
                    Batas panjang response AI. 1000 token ≈ 750 kata
                </p>
            </div>
        </div>
    );
};

export default AskChatGPTView;
9. Buat Python Script sebagai Logika utama
- Buat file di scripts/send_completion_request/send_completion_request.py dengan full code di bawah ini:
import json
import argparse
import requests


def run(ctx):
"""
Mengirim request ke OpenAI ChatGPT API.

Execution Context (ctx):
- ctx["parameters"]   : Input dari user di BPMN (prompt, temperature, max_tokens)
- ctx["configuration"]: Konfigurasi addon (api_key, model, system_prompt)
- ctx["variables"]    : Data runtime dari workflow
- ctx["runkey"]       : Unique identifier untuk logging/tracing
"""

# ── 1. Ambil konfigurasi addon ──────────────────────────────────────────
config = ctx.get("configuration", {})
api_key = config.get("api_key")
model = config.get("model", "gpt-3.5-turbo")
system_prompt = config.get("system_prompt", "You are a helpful assistant.")

# ── 2. Ambil parameter dari user (input di BPMN) ─────────────────────────
params = ctx.get("parameters", {})
prompt = params.get("prompt", "")
temperature = float(params.get("temperature", 0.7))
max_tokens = int(params.get("max_tokens", 1000))

# ── 3. Validasi input ────────────────────────────────────────────────────
if not api_key:
    raise ValueError("API Key tidak ditemukan dalam konfigurasi addon")
if not prompt:
    raise ValueError("Prompt tidak boleh kosong")

# ── 4. Siapkan request ke OpenAI ─────────────────────────────────────────
headers = {
    "Content-Type": "application/json",
    "Authorization": f"Bearer {api_key}"
}

payload = {
    "model": model,
    "messages": [
        {"role": "system", "content": system_prompt},
        {"role": "user",   "content": prompt}
    ],
    "temperature": temperature,
    "max_tokens": max_tokens
}

# ── 5. Kirim request & proses response ───────────────────────────────────
try:
    response = requests.post(
        "https://api.openai.com/v1/chat/completions",
        headers=headers,
        json=payload,
        timeout=60  # 60 detik timeout
    )
    response.raise_for_status()  # Raise exception jika status 4xx/5xx

    result = response.json()
    ai_response = result["choices"][0]["message"]["content"]
    tokens_used = result.get("usage", {})

    # ── 6. Return output sesuai contract ─────────────────────────────────
    return {
        "status": "ok",
        "message": "ChatGPT response received successfully",
        "data": {
            "ai_output": ai_response,
            "model_used": model,
            "tokens_used": tokens_used
        },
        "runkey": ctx.get("runkey")
    }

except requests.exceptions.Timeout:
    raise Exception("Request ke ChatGPT API timeout (>60 detik)")
except requests.exceptions.HTTPError as e:
    raise Exception(f"HTTP Error dari OpenAI: {str(e)}")
except requests.exceptions.RequestException as e:
    raise Exception(f"Gagal menghubungi ChatGPT API: {str(e)}")
except (KeyError, IndexError) as e:
    raise Exception(f"Format response OpenAI tidak terduga: {str(e)}")


# ── Entry point: dipanggil oleh platform Alurkerja ───────────────────────────
if __name__ == "__main__":
parser = argparse.ArgumentParser(description="ChatGPT API Integration Script")
parser.add_argument(
    "--run",
    required=True,
    help="Execution context: path ke file JSON atau JSON string langsung"
)
args = parser.parse_args()

# Load execution context
if args.run.endswith(".json"):
    with open(args.run, 'r') as f:
        ctx = json.load(f)
else:
    ctx = json.loads(args.run)

# Eksekusi dan output ke STDOUT
try:
    result = run(ctx)
    print(json.dumps(result))
    exit(0)  # Success
except Exception as e:
    error_output = {
        "status": "error",
        "message": str(e),
        "runkey": ctx.get("runkey")
    }
    print(json.dumps(error_output))
    exit(1)  # Business error
10. Lengkapi file index.json dengan lengkap dan pastikan semuanya sesuai dengan project views dan lain-lain.
{
    "name": "ChatGPT-API-Integration",
    "addon_key": "chatgpt-api-integration",
    "version": "1.0.0",
    "description": "ChatGPT API integration addon untuk Alurkerja platform.",
    "author": "NamaAnda",
    "license": "MIT",
    "type": "REST",
    "view_type": "MFE",
    "view_path": "views/dist",
    "component_scope": "chatgpt_view",
    "custom_views": {
        "CONFIGS": {
            "CREATE": "chat_gpt_config",
            "EDIT":   "chat_gpt_config"
        },
        "ACTIONS": {
            "sendCompletionRequest": "ask_chatgpt_view"
        }
    },
    "config": {},
    "scripts": {
        "sendCompletionRequest": {
            "description": "Script untuk mengirim request ke ChatGPT API dan mendapat response AI.",
            "scripts": {
                "type": "python",
                "executable": "scripts/send_completion_request/send_completion_request.py"
            }
        }
    },
    "actions": {
        "sendCompletionRequest": {
            "name": "Ask ChatGPT",
            "description": "Mengirim pertanyaan ke ChatGPT dan mendapat response AI.",
            "type": "SCRIPT",
            "endpoint": "sendCompletionRequest"
        }
    }
}
11. Publish Addon
- Build frontend dulu
→ npm run build
→ cd ..- Publish ke AlurKerja
→ npx alurkerja-cli addon publish12. Cara Verifikasi Publish berhasil
- Masuk file .bpmn cari service task dan masuk ke setting
- Pilih Add Integration

- Pilih ChatGPT API